Saturday, January 31, 2015

Brand NEW Memory Box ETC....Whoot! Whoot!


Double Heart Banner

Good morning, Chatham.  We've got great new Memory Box, Spellbinder, and Impression Obsession dies!  A bunch arrived this week, with more expected next week.  These new releases have been incredible and I just HAD to bring them to The Pickle.  Here are just a few of the awesome new dies!!

Fairyland Butterflies

Steampunk Corner

Stop in today to have a look.  We are open from 10am-3pm.

Hope you are having a great weekend.
Kim


Friday, January 30, 2015

All that Glitters.....

My mason jar made I showed off at The Wedding Show

...is gold!  Oh gold.  Beautiful gold.  Anyone else a gold girl like me?  It is SOOO pretty.  And have you fellow gold girls been noticing the latest trend?  Gold is everywhere and I'm loving it!  From fashion to home decor to paper crafting!  It is the perfect compliment to any ordinary item.  Look how the gold flake gave a mason jar an almost regal appearance.


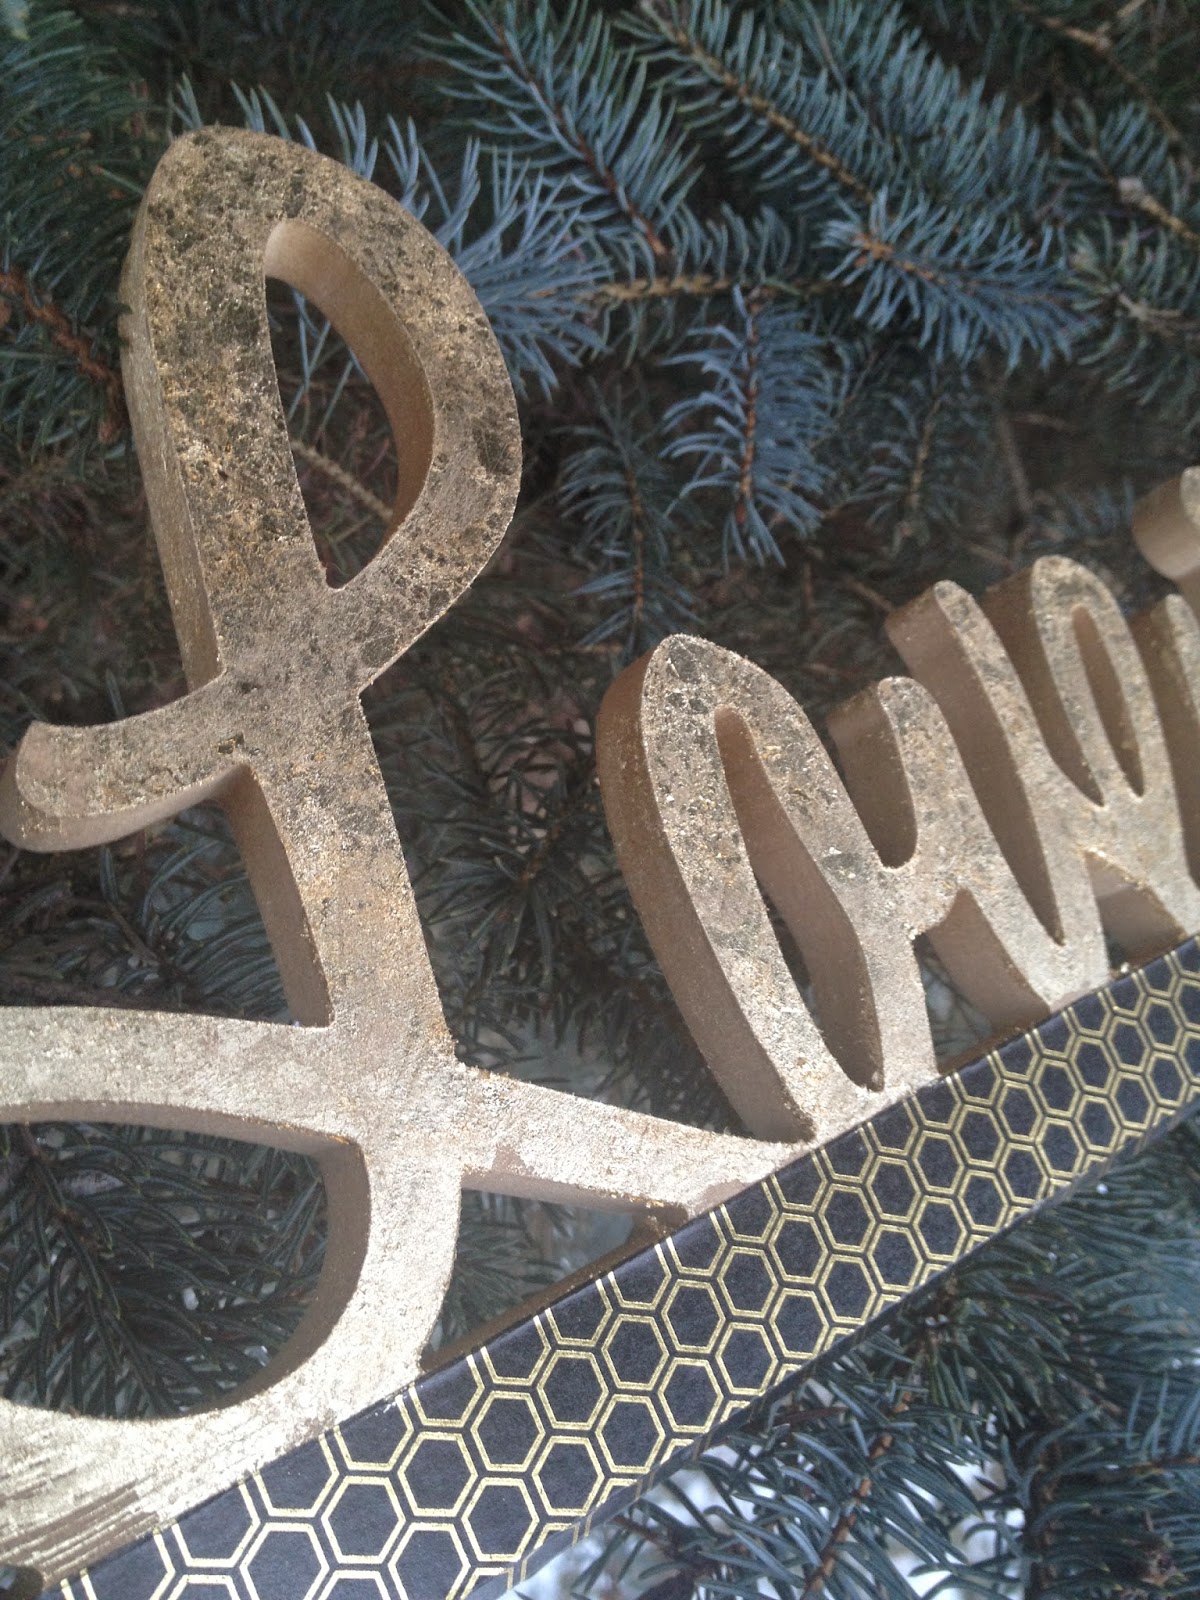
I took on another project the night before the Chatham-Kent Wedding Show (hey, why not?)  Have a look at this Kaisercraft MDF cut-out..... in gold!  It is almost 3' in length and I knew it would give our booth that perfect touch.  Can't you see this on a dessert bar table at a wedding?  Or have a look at it as a prop in a photo...


 I told the kids they had to help me with my blog post this week.  They are always such good sports.

Closer look
Here is a closer look that shows how beautiful the gold flake can be.  You will notice that I added some foil washi tape to finish the base of the project.  I love the gold honeycomb design with the gold flake.

How to: 
Adding gold flake to your next project is very simple if you use the right product.  The secret ingredient....

US Art Quest's Duo Adhesive
The Duo adhesive is THE glue to use and makes addition of gold flake fool proof.  It "stays open until it is closed".  This means you apply a thin layer to your next project using a foam or paint brush and then you leave it to dry.  It is ready to use once it turns white to clear.  The gold flake will stick to the project 15 minutes after applied, 1 hours after applied, etc.  It is like it is waiting for you.  And don't let the small bottle fool you....a little goes a long way!

Here is what gold flake looks like.  It comes in a bag and you basically just "smash" it on your project. The excess gets brushed away using a textured sponge or stipple brush to use on future projects. 

Here is a video from Susan of US Art Quest showing how you use her product....


So what do you think?  Are you in love with gold too and ready to take on some projects of your own?

Kim

Store Hours
Wed - Fri - 10am-5pm
Sat - 10am-3pm

Wednesday, January 28, 2015

Wedding Show - Sweet Success


We are True to Ourselves...
Well that was quite the week!  Jen and I were busy prepping for the Chatham-Kent Wedding Show which took place on Saturday at The Bradley Centre.  Thank YOU to the girls who stopped by the booth to share your "Bride Style"!  It's so funny but three years ago I joked and said if you are looking for The Paper Pickle booth, look for the one with wood and burlap, NOT satin and rhinestones.  When you looked around the Bradley in 2015, you saw lots and lots of burlap, antiques and that gorgeous rustic look.  This is by far the hottest wedding trend out there these days.  Hey.  What can I say?  We KNOW what we like.  We keep with OUR style and NEVER imitate.  We're just cool like that....♥

We Listen...
And that's not to say that "rustic" is the ONLY thing we do!  We have always been about listening to our customers and designing something that suits THEIR style and THEIR vision.  We are creative by nature and can execute your ideas timely and professionally. 

We DO Sweat the Small Stuff...
To us, life's details matter.  We care about whether you think the invite looks better with square or rounded corners.  We care to know if glitter suits YOUR style (hey, not all girls are glitter girls!) and don't go shaking it around unless you tell us too!  They may all seem like "little" things, but, to us, all of these little details do matter to the overall look.  It is OUR goal for you to be 100% happy with our designs.

We Celebrate...
So what do you think?  The booth came together even better than I had planned in my mind!  I wish I could give you a few more detailed shots but the photographers has run across the pond and will not be getting our pictures any time soon.  These overall views of the booth will give you a nice flavour for what we displayed.  I am very pleased and think our hard work showed!


We work TOGETHER...
This year's booth showcased how well Jen's baking and my stationery designs come together to create one seamless vision for your next event.  And your next event does not have to be a wedding!  We love to create custom designs for anniversaries, birthdays, retirements and more!  Make an appointment with us and tell us your ideas.  We will make your vision come to LIFE!


Weddingstar Orders are always Welcome!


I also wanted to focus on my Weddingstar offerings.  This company is amazing and has thousands of products that would add to any party!  Check out those hot are balloons!  I am in love!  All of these items including:  favours, printed paper napkins, ring pillows, champagne flutes, etc. can all be ordered in and take approximately one week to come in (as long as they are not back ordered).  I offer 13% off ALL orders and no additional shipping!  Click the link above and see what could brighten up your next party.


Kim

Store Hours
Wed - Fri - 10am-5pm
Sat - 10am-3pm

Wednesday, January 21, 2015

New CLASS Alert & Wedding Show

Debbie's Mixed Media Class

Classes are back!  We are thrilled to offer TWO opportunities for you to enjoy a night out with your fellow paper crafters while learning and creating beautiful projects!

Mixed Media by Debbie
A closer look at the details
Debbie has created a beautiful 8x10 mixed media project perfect for this time of the year.  The project is designed on a gorgeous wood wall panel which has a wooden front and wooden sides and is sure to hold its form.  It is perfect for hanging or set on a side table.

This mixed media class is great for all levels of crafters.  You will learn some of the basics of mixed media including working with gesso for priming, working with paper and collage work, working with rub-ons, stamps, embossing paste and more.  You must come in and have a look at this project in person. Debbie has achieved a project with many layers of creativity.  The longer you look, the more you see!

Date:  Wednesday, January 28th
Time:  5:45-8pm
Cost:  $25+hst (price includes a Homebaked Kitchen cupcake of your choice!)
Required Supplies:  good scissors
Suggested Supplies (please bring if you have them):  a heat gun or hair dryer to speed drying process, black brush pigma pen

Three Cards by Kim

Card 1 - Pretty Bird
Work with rub-ons, background stamps, washi tape, pencils and more.
Card 2 - Rustic Floral
Work with embossing paste, distress inks, vellum, stamps and more.
Card 3 - Pretty Heart
Design with various dies, washi tape and well, that's about it.  Ha.
I am very excited to be teaching again this year!  These cards are beautiful for any occasion but can certainly be used for Valentine's Day.

Date:  Thursday, February 5th
Time:  5:45-8pm
Cost:  $22+hst (the price includes a Homebaked Kitchen cupcake of your choice)
Required Supplies:  adhesive, good scissors
Suggested Supplies (only bring if you have these):  ruler and coloured pencils

How to Register
If you are interested in the classes above, you can call the store to reserve a spot (519-351-5220) and/or you can come in to register in person.  Payment is required within 48 hours of registering.  If you are unable to make the class, it is your responsibility to find a  replacement.  Thank you for understanding.

Wedding Show
Just wanted to let you know that Jen and I will be attending the 2015 wedding show THIS Saturday at The Bradley Centre.  If you know of anyone who is getting married, please forward on this information.  If you are getting married, come and chat with us at the  show!  We would love to hear your ideas and work with you to make your vision come to life!

Hope to see you soon.
Kim

Store Hours
Wed-Fri - 10am-5pm
Sat - 10am-3pm


Thursday, January 15, 2015

NEW! NEW! NEW!

Wish I had better lighting to show you how soft and pretty this card is.
I truly could not WAIT to work with these new MB Dies.
I'll bring it to the store this morning for ya!
 It has been a busy couple of days checking and receiving all the new product that has arrived!  Scrapbookers will be thrilled to see the new Dear Lizzy, Project Life, Heidi Swapp and Teresa Collins lines!  Thanks to the amazing requests from a few customers, we now have these pretties at The Pickle!!

Here is a little look....


The card makers will be wowed to see the January Memory Box dies IN STORE already!!  There are 18 new dies as well as some favourite re-orders.  There are also a few new stencils.


This latest release was a good one with a little bit of everything from florals to hearts, tractors to fun design elements.

Stop in and have a little look.  While you're at it, check out Homebaked Kitchen's new cupcake flavours:  mocha and snickerdoodle.  Jen also has her famous salted nut bar which I must admit is the family's all time favourite!

See you soon!!

Kim

Friday, January 9, 2015

CRAFTY Kindness


Christmas Wallet Folio
I have often told people that I have THE nicest customers in this town. You really are! I have a theory that those people who enjoy crafts are generally more loving and giving individuals. I mean you almost have to be to spend two hours making ONE card or two WEEKS making a scrapbook only to give it away!

Thank you to those who sent us Christmas cards this year...how nice of you!  They are all on display at the store so stop in an take a peek and get a little inspiration for next year's cards!

I wanted to take a little time to showcase two very special gifts that were given to me by customers/friends before Christmas.  You guys really do not need to make me anything, but oh am I so grateful when you do!  ;)

Christmas Wallet Folio by Barb McNaughton
Let's have a look inside
So you all know that I got this adorable little "Polaroid-like" camera this year for Christmas.  I just love it!  I took pictures of some of my favourite moments over the holidays.

So I had this deck of photos and did not know where to put them to keep them safe.  I checked on line for possible albums made for the the Instax photos.  They were all so plastic-y and boring.  Then I wondered about an Instagram album from We R Memory Keepers but the photo sleeves were not the right size.  Then I remembered about this beautiful album, Barb gave me as a gift for Christmas (how sweet of her!).  This little folio was the PERFECT (I mean perfect!) little album for my very special pictures.  Have a look.....
View once opened
There is a waterfall of 4 cards in the centre
with an additional pocket to the left
Another look at the stacked waterfall cards
Photos can go on both the front and back of waterfall cards

I love the look of the washi tape on the corners
of these vintage looking photos
Here is a look at the additional cards.
I journaled my thoughts and memories on the back
of one of those cards

Barb's inspiration came from a YouTuber named Sabrina Radeck.  I am embedding the video from November 19, 2014 here for your reference just in case you want to make one of these too!

Please note that Barb altered Sabrina's project as she wanted to use her 6x6 paper pad from Authentique called "Believe".  Here are Barb's notes:
  • In Sabrina's video, she uses card stock cut to 8.5" x 11"- I cut mine to 6.25" x 11"
  • I used her same score lines
  • I did my flaps 4.75 x 3.25,5 x 3.25, 5.25 x 3.25, 5.50 x 3.25 ( I scored all at .50)
  • Optional pocket 7.25 x 2.25, scored .50 on 2 short and 1 long side
I think Barb may have me wanting to make many more themed wallets!  This is MY kind of scrapbooking project for sure!  What do you think?  I love it!!

Jingle all the Way Shadow Box by Laina Millson

When Laina asked me to order in Teresa Collin's paper from her 2013 Christmas line, I knew she had something special in mind!  I was so glad I could still get it too.  Never did I imagine I would be a recipient of one of her lovely gifts!!

Here are the details:
Laina was inspired by Kerri Bradford's tutorial from October 30, 2013.  I am attaching the link here now.

Laina told me she made these projects in various sizes based on the shadow boxes she picked up.  It is just gorgeous and looks nice on a sofa table along with other "props" or on the wall.  This project will be put some where very safe (once it leaves the store) so I can admire it for many more Christmases to come!!  Thank you again, Laina.

Both projects are at the store for if you want to have a closer look!  I hope this has inspired you.  I know it has inspired me!  Looking out the window at this moment, I can forecast a little crafty time in my VERY near future.

Kim

Store Hours
Wed-Fri -10am-5pm
Sat - 10am-3pm


2014 Tag Swap - Get ready to be WOWED!


I heard a few of you were curious to see the creations from this year's tag exchange.  For those of you who participated, you would have seen only HALF of the entries as we had TWO full groups!  How cool.  For those of you who did not participate...shame on you!  Ha.  Just kidding.  But truly, I would love to see even MORE people take part in our exchange.  All of the tags were wonderful in their own unique and creative way.  I know YOU would be an amazing contributor to this FUN and calorie-free Christmas exchange.  Just think about it....you've got a little time.

Without further ado, here are the masterpieces.  Please note they are in no particular order (only the way blogger wanted to upload them).  Also, I will apologize in advance as my photos of the tags may not do them justice.  Please stop by the store to see them in person in all their glory.

I love Tania's little details from
the rhinestone on top of the patterned tree
 to the washi tape border.
The embossed background was also a wonderful touch.
Adorable.
I think Tim himself would give Jasmine two thumbs up
for her design and use of embellishments.
There are wooden snowflakes, burlap, raffia, twine and more.
Sewing on the burlap was a subtle yet perfect touch.
Rustic.  Classic.
Again it is the little details that make Lou's tag outstanding.
That little vintage lace at the top is perfection.
And check out the large eyelet and metallic charm.
Great job.  You have a great eye for colour.
Kathy's tag is one that MUST be seen in person.
Honestly every little detail was carefully thought out
from the wooden button to the jingle bells on top
to the tinsel snowflakes around the tree.
Truly a classic.
Is this tag not a work of art?  I may have to ask Pat just how she achieved that
perfect silver metallic finish on the skate blades.
Even the whites of the leather have been "roughed up"
a little.....definitely the skates of someone who loves the ice.
Incredible.
Erin's watercolour background and pastel colour choices
really made her tag stand out.  She even used embossing paste
and a MemoryBox stencil to add to the whimsical feel of the design.
This makes me happy.
I want to live in one of those cute little houses!
Jenny's tag is simple yet the perfect addition on any gift.
You can't see it here, but she used a glitter pen
to outline the stamped image.  What a great touch.
Very nice.
Carol's design is clean, elegant and classic.
The foil tapes in gold and silver are the perfect way to add to the design.
I will have to ask which embossing folder she used.
Perfect.
Ok.  How cute is this guy?
No matter how hard I tried it just kept fooling around while I took his picture!
Anyone would love how playful Carolyn's tag is!
Very charming.
Donna's creations are always so detail oriented and
 I have such an appreciation for her work.
This wreath was hand stitched!
The little holly stickers are perfectly in place.
Beautiful.
Debbie's tag is incredibly elegant.  It is full of regal sparkle and shine.
I love the use of gold mirror paper used on the candles and holly.
Is that pearlex powder that adds that beautiful shine to the snowflake background?
Very nice work.
Debbie just loves her little birds and so do I!
I love the layers of greenery, embossed background
and use of rhinestones and sequins.
It's like that little guy is looking up at the
25 and thinking "Yay.  It's here!"
This photo does not show it very well,
but the dimension on Helen's tag is really what makes it!
Check out the subtle stamped background, the waxed twine and gold flourish.
Very, very nice.
Hilary has always been my technique girl.
I will have to get all the details next time I see her
but I am pretty sure she used a stencil (or is a stamp?),
watercolour markers and a little pearlex powders
to create her one of a kind background.
 Ok and look at that adorable tag on a tag!
Great.
Barb is known for using only the prettiest papers.
Look at the gold mirror and pow glitter used on the ornament.
The paper piercing along the edge of the tag
and the white on white snowflake flourish
have to be my favourite aspects of the tag.
Beautiful.
After seeing Heather's tag, I almost changed my entire design.
I wanted to be FUN too!!
Look at this...it is simple yet so playful and cool.
Nice work, Heather.
Barbara has mentioned a couple of times about her love
of LaLa Land stamps and I was so pleased to see her tag entry.
Isn't she adorable?
The snowflake border, poinsettia and rhinestones are great!
Too fun.
What a wonderful choice of colour, Jody.  It is so pretty and elegant.
The shape also adds to it's classic design.
The shimmering snowflake and ribbon at the top are a great addition.
Gorgeous.
Anyone who likes to heat emboss MUST re-create Nancy's design.
She has die cut the reindeer, tree and flourish and has heat embossed
those three pieces PLUS the outer edge of both layers of the tag.
It is finished off with a beautiful blue wired ribbon and bell.
Rich and rustic.
I love how rustic and unique Becky's tag is!
She and her daughter cut out a star using card stock
and then used that template to cut a star out of real burlap!
The crafty buttons in such bright colours makes this tag so playful.
Such a sweet country craft.
Kell worried that her tag would not be "good enough".  Really?
Sorry for the glare off the foil washi tape but this tag is
regal, masculine and very on trend with its gold detailing.
The wired gold ribbon and bells are just a couple of the "wow" factors.
Gorgeous.
I loved how Jen put her own spin on the tag swap idea!
She did was she does best (baking)
while adding a little stamping fun!  The green background is a stamp!
Lovely AND delicious!
I had posted my tag before Christmas but I thought I should
include it here with the rest.  I too wanted to design something different.
Wine is one of those gifts I bring as hostess gifts
but I always hated throwing the pretty bottles in plain old bags.
This is where my idea come from!  And that stamp....love it!
All of these tags are now in store as they deserve to be on display for a little while.  So much work had gone into them from the design choices to the minute details.  I am so impressed with the amount of effort and love you have shared with your fellow crafters.  Now isn't THIS too what it is all about at Christmas?  Taking the time to enjoy your love of the hobby while creating something beautiful for someone else?  You get doubly rewarded when you craft....you are rewarded while doing the crafting and also rewarded once you see the recipient's reaction.  Ahhh....Keep on sharing that love!

Kim

Store Hours
Wed.-Fri. - 10am-5pm
Sat. - 10am-3pm